Monday, April 29, 2013

Washi Dress V2.0 and Me-Made-May Pledge

So nice, I made it twice! Back to back. No waiting!!

Washi Dress V2

So yeah, I was wearing the crap out of Washi V1.0. And lets just say I live in a very small town where my work circle and my social circle are pretty much just one big circle, which also overlaps with my errand running circle and my dog walking circle. After I'd worn Washi V1.0 for  the entire week following its creation, I figured I had better make version 2 the next weekend, so as not to run the risk of being that girl with only one outfit. 

Washi Dress V2 side

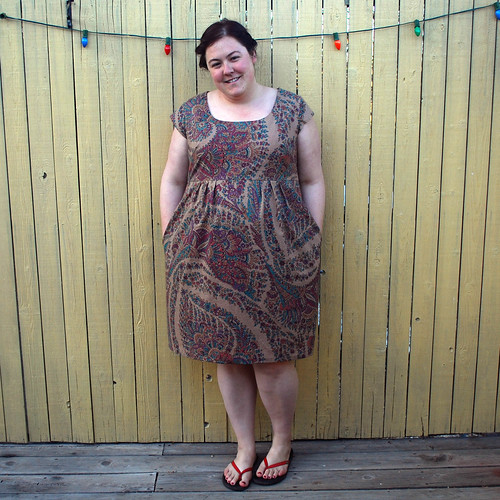
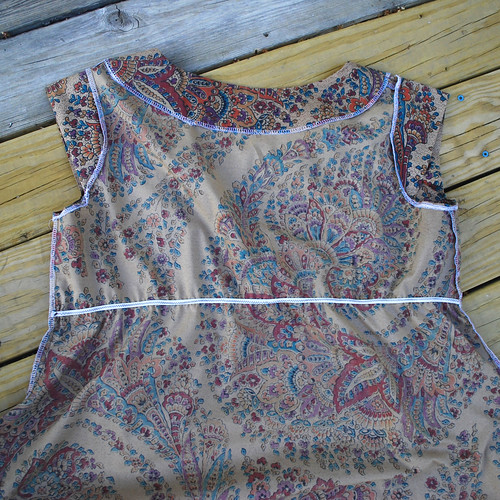
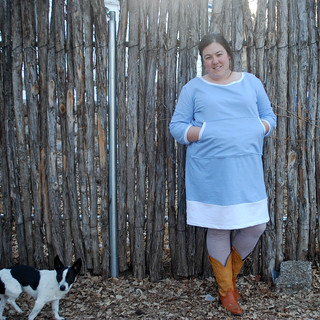
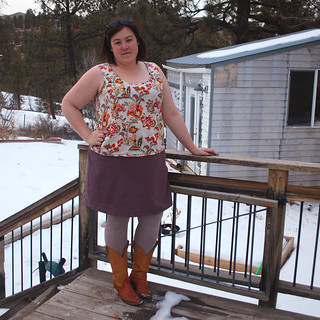
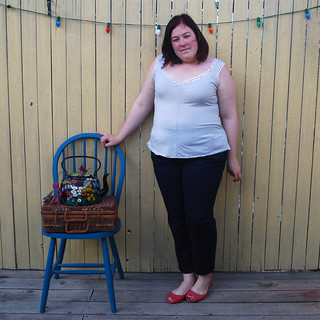
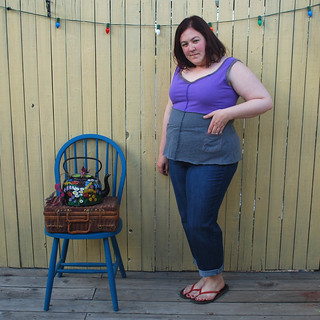
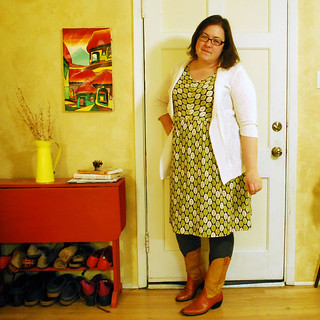
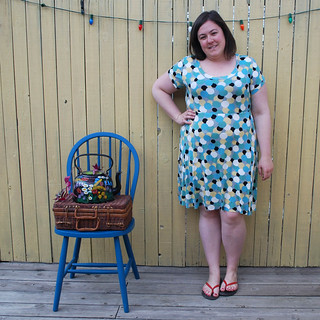
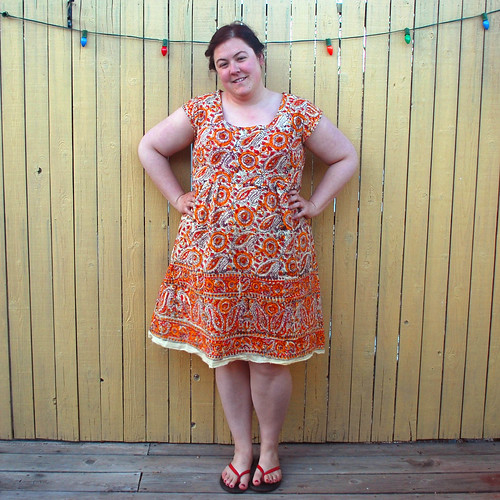
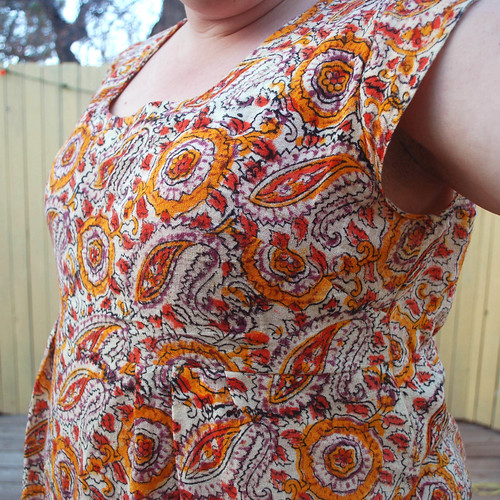
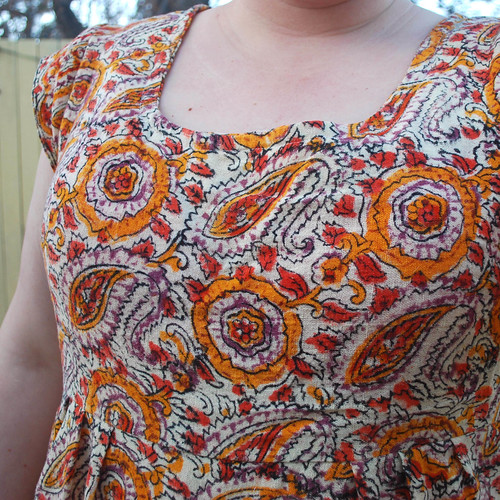
I love this dress at least as much, if not more. Its made from another estate sale acquisition. I'm not sure what this piece of fabric was originally used for, but it had a big wax stain on it so I'm thinking tablecloth?

Washi Dress V2 front

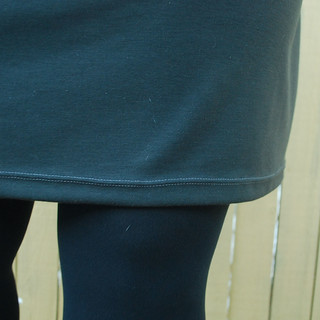
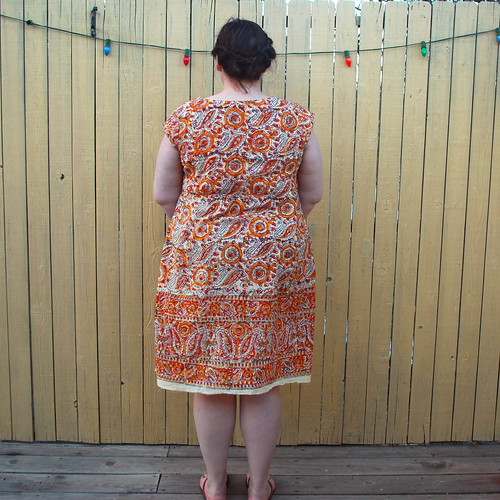
So, you guys caught me. Totally haven't hemmed it yet though I did wear it once already. I MUST hem it because I want to take it on my trip this weekend and its already started fraying a little. The pressure is on! 

Washi Dress V2 side detail

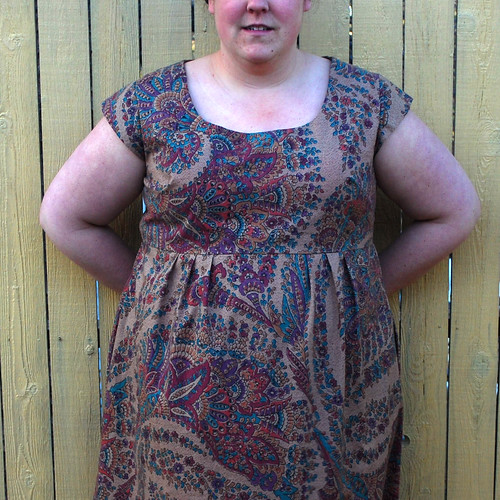
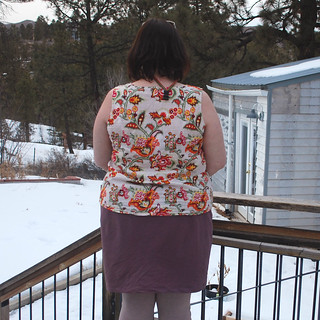
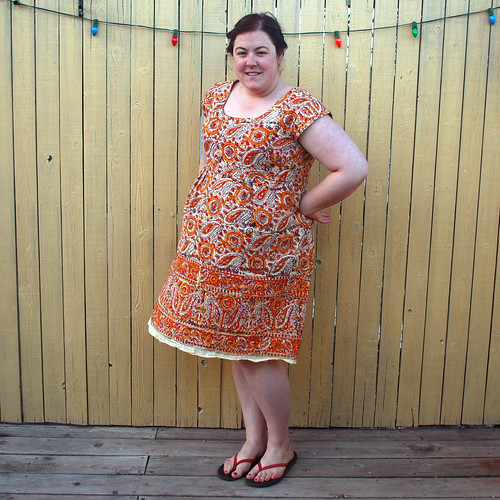
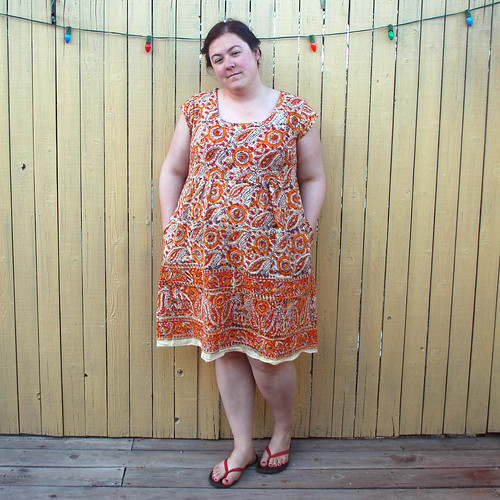
I made the same modifications to the back that I made in version 1 but I was sure to stretch the elastic a little more tightly across the back because it was a little loose on the first version. I removed the 1 inch that I added to the center front of the bodice since this fabric is a little spongy and has some mechanical stretch. 

Washi Dress V2 back

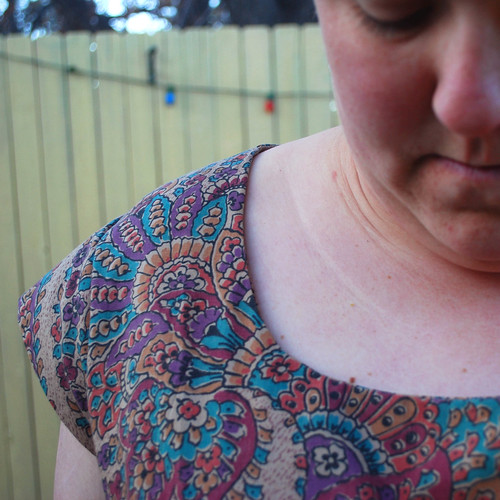
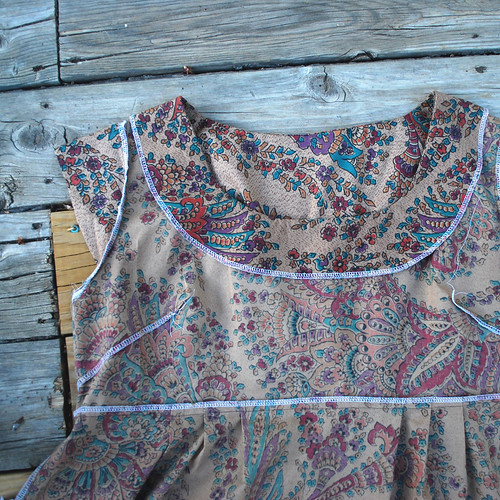
This fabric was pretty much a cranky little bitch to work with. Or maybe that its just that I was too lazy to iron it before cutting. But I was scared ironing would affect the natural texture of the fabric and plus I don't have an ironing board so ironing a huge piece of fabric is SO HARD. Obviously this is an easily fixable problem, but I'm just not sure where I would put an ironing board in my 800 square foot house. Speaking of... home upgrade with room for sewing is forthcoming (fingers crossed). ANYWAYS, the neckline ended up slightly wonky so I topstitched down the facing to try to stabilize things. 

Washi Dress V2 bodice detail

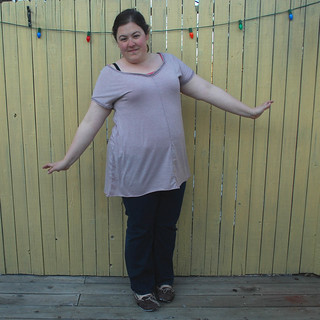
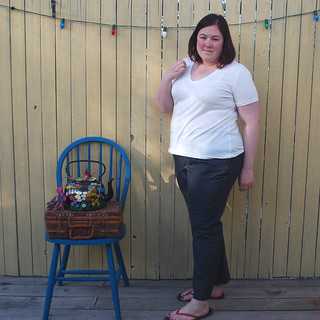
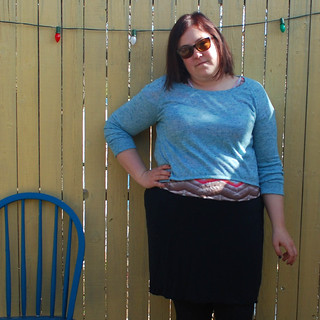
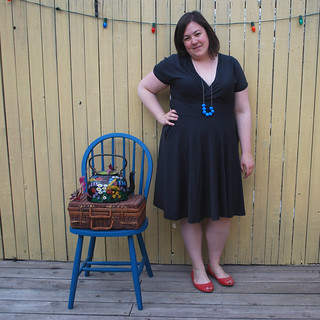
So... I've been considering Me-Made-May. Obviously I've made a lot of stuff to wear. The Six Month Sew-iversary posts have already covered all the visible clothing I've made (the only stuff that hasn't been photographed is PJs, slips, and stuff for other people). That means I have a total of 26 wearable garments, plus the 2 washi dresses, 1 maxi dress, and 1 t-shirt I have made during April.

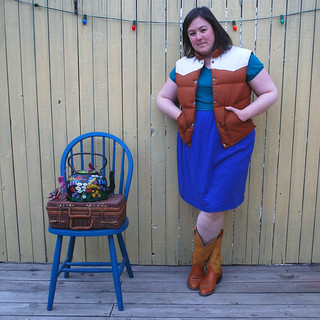
To the uneducated eye, I've made some pretty practical and easy to wear stuff. However, turns out I'm a geologist and am bound to a pretty specific safety-related dress codes at work- or at least the 50% of the time that I'm working outside and not in the office. I'm required to wear long pants, shirts with sleeves, and "sturdy work shoes". On top of the requirements, we sometimes get pretty dirty and have to deal with very variable weather conditions on a daily basis, which also affects how I dress. So, in reality, most of what I've made is not all that practical for about half of my life, between the 50% of my work that time I spend outside (its going to be more like 100% for the month of May- I have very little control over my work schedule) and the 50% of my non-work fun-times that I also spend outside hiking or rafting (especially during May!).  Plus, I'm going to Florida next weekend, will have two house guests for a week, and am probably going camping in Colorado the last weekend of May. So yeah, I've been conflicted about my Me-Made May contribution... both because of the logistical challenges but because I also really wanted to participate! Its something I've been looking forward to since before I started sewing and watching some of my favorite bloggers participate was one of the things that inspired me to get sewing to begin with!

So... without further ado...

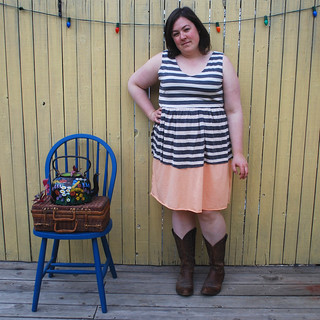
'I, Megan of The Green Violet, sign up as a participant of Me-Made-May '13. I endeavour to wear AT LEAST two me made items each week for the duration of May 2013. I also resolve to make two items that will accommodate my dress code at work and outdoor hobbies (hiking/ rafting) so that I will be able to wear more than two items a week by the end of the month.' 


 signature2

Tuesday, April 23, 2013

Washi Dress V 1.0

I'll interrupt this regularly scheduled sewiversary programming to bring you....

Washi Dress V1

my NEW WASHI DRESS (version 1)!!

Ok, lets be honest here. I was VERY reluctant to buy a PDF pattern for $16. I prefer the ones that cost $3- $8 dollars, with the Colette PDFs at the top (and well earned) end of the range at $14. This pattern first caught my eye because its very similar to a ready to wear dress that I own but don't wear as frequently as I would like to because its just a tad bit too short. I resisted buying the pattern due to my deep seated cheapness thriftiness, but once it started warming up I totally caved and clicked the purchase button. 

Washi Dress V1 side

Did I have a little buyers remorse? Only until I made my first version! I LOVE the dress and its nice to be able to support an independent pattern maker. Made by Rae has patterns for different types of sleeves on her blog, plus this can be made sleeveless, in longer or shorter lengths, and the pattern included pieces for a different type of neckline. I know I will make several version of this pattern and probably one or two for my sister or friends, so I think I'll get my money's worth. Also, I made it out of three dollar sheet, so there is that! 

Washi Dress V1 back

Ooooooooooof cooooooourse, I made some changes. The pattern is sized from and XS- XXL (32- 44 inch bust), which I greatly appreciate! I love it when pattern companies accommodate a wide range of sizes (though, of course, this isn't all-encompassing by any means). Though the bust measurements should have just barely fit, I was concerned the waist would be too small and I did want it to be a bit loose fitting, as inspired by my original ready to wear dress. So, I added .75 inches to the center front of the bodice and skirt pieces. I meant to add .75 inches to the center back but I forgot and it worked out just fine. I suspect that my back is smaller than my front, though I'm not sure how to figure that out. Sorry I'm standing to so wonky up there. 

Washi Dress V1 front detail

I love, love, love the cute little cap sleeves. I'm not a huge fan of going sleeveless, so these are the perfect compromise for those baking southwestern summers. I was a little hesitant about the pleats since I just don't really have any clothes with pleats, but I really like them. On the inspiration dress, the skirt is gathered in both the front and back and I may try that on a future version. Also- POCKETS!! And the pockets are not a separate pattern piece, but rather are just included as part of the skirt pieces. This was SO MUCH easier than my last pocket making experience (the Tiramisu).

Washi Dress V1 fabric detail

For a sheet, I think this is some pretty awesome fabric. I actually bought it at a friend's grandparents' estate sale, so thats kind of awkward. But seriously, they had the BEST linens. And my friend appreciates a good upcycle so she isn't offended by my usage of her grandparents sheets. Ok, this is getting a bit creepy... no?

Washi Dress V1 front inside

So yeah, the serger hasn't gotten old yet. This dress finished up so quickly and nothing frays! Its practically a miracle! This was (I think) my first facing experience and I'm a bit on the fence about it. Obviously I could do some bias binding on the next version... something to consider. There was also this weird thing in the pattern where you cut out the darts before you sew them up. I was a bit confused at first, but it worked out pretty well. 

Washi Dress V1 back inside

Also, I kind of hate shirring, which is what this pattern calls for to give the dress some shape in the back. Its hard to do, I think it looks kind of cheap (don't hate me!), and its fails pretty easily when the elastic thread inevitably snaps. Plus, the shirring goes pretty far up the back, which I didn't think would look to good on me. I just did a simple piece of thin elastic stretched across the back using a zig zag stitch at the same latitude as the waist seam. I'm not 100% sold on this looking much better, but it does the job and was significantly easier and will hopefully last longer. 

So, thats my Washi story. I've already made another. Out of a sheet. I think this is the perfect pattern to showcase a bold print, and there is nothing quite as awesome as a bold print in the summer! Go forth and make one for yourself! And speaking of going forth and making stuff... can someone please chastise me for not even having ordered the patterns or fabric for the quick dry skort and possibly tops and sports bras I want to take on my big river trip that is LESS THAN TWO MONTHS AWAY? I seriously need to get on that. 

 signature2

Sunday, April 14, 2013

Six Month Sew-iversary: THE THINGS FOR THE BOTTOM HALF

Well, the sewing round up continues, but never fear, we're almost done here! Here are the things that keep me decent when out in public. As much as I hate pants (trousers), turns out you have to wear them sometimes! Thank goodness for the far more comfortable leggings and skirts options. 

Already blogged:
chevron shirt gray skirt skirt hem Clovers and Scout Tee
Tiny Pocket Tank back

And....... the new stuff:
sweatshirt dress Clover Pants V2
Self Drafted Etsy Tutorial Leggings V1 // Colette Patterns Clover Pants V2
Self Drafted Skirted Leggings v1
Self Drafted Skirted Leggings V1

I've also updated the TOPS post with the Hot Cocoa Sweater that I forgot to photograph. Whoops!

I'll wrap this thing up in the next post with some miscellaneous items and stuff made for others, then it will be on to the new stuff! I made a Washi dress last weekend and I like it so much I made another yesterday! I'm also working on a little massive hand sewing project- a maxi version of the Alabama Chanin Fitted Dress that I would like to get finished up before my trip to Florida in May. What have ya'll been sewing this weekend?

 signature2

Thursday, April 4, 2013

Six Month Sew-iversary! THE TOPS

Thank you all for your kind comments on my last post. You guys may have to scale back your shock and awe after you see the rest of the garments, though. I'm counting some super easy tops and even two slips and some leggings in the count, so I think the number sounds more impressive than it really is. However, I will admit that I have definitely become a sew-aholic. The urge to sew is strong with this one!

Onwards and upwards to the things I've sewn that are loosely qualified as TOPS, including but not limited to tunics, t-shirts, sweaters, tank tops, and things only suitable for layering under other things. Here are the ones you have already seen on the blog:

01.22.13Clover and Scout Tee 2- Made by Me
Tiny Pocket Tank FrontBlank Canvas Tee plus Alabama Chanin Tunic front

And here are the newbies:

Tiny Pocket Tank V2M6398 V1
Grainline Studio Tiny Pocket Tank V2 (in jersey) // McCalls 6398 V1
 Alabama Chanin Fitted Tank V1Alabama Chanin Fitted Tank V2
Alabama Chanin Fitted Tank V1 // Alabama Chanin Fitted Tank V2
 M6658 B V1M6566 V1
McCalls 6658 V1 // McCalls 6566 View D V1

Ughh, I can think of at least one sweater I forgot to photograph (Dixie DIY Hot Cocoa Sweater)! I'll try to update that at some point... maybe....

UPDATE! Here it is.
Hot Cocoa Sweater V1
Dixie DIY Hot Cocoa Sweater V1

Up next: things that cover the bottom half of my body.

 signature2

Monday, April 1, 2013

6 Month Sew-iversay!?! THE DRESSES

Hear ye!  Hear ye!
Its my six month sew-iversay! 
Is that thing? I don't care! Champagne and cake all around! 

Green Leaves 123112Blue Ballet Dress
gray pattern tiramisusweatshirt dress

Above, you can see the stuff that has already been blogged (like software, the V's refer to the version number). Below, you can see the other stuff. I'd say these photos pretty well illustrate the fact that I have grown a little... uninspired trying to back blog all the garments that I've made. I feel like I'm trying to play catch-up and it makes it hard to focus on the new stuff. Plus, some things just don't deserve a whole blog post, though I do want to keep a record of most everything I've made just so I can keep track of the evolution of my sewing through time. So, here is a major photo dump of things unblogged thus far: THE DRESSES

 floral ballet dresspolka dot ballet dress
Dixie DIY Ballet Dress V1 (muslin; now wearable for festivals!) // Dixie DIY Ballet Dress V2 (muslin; now wearable with shorter sleeves!)
self drafted everyday dress v1solid gray tiramisu
Self Drafted Everyday Dress V1 // Tiramisu V2
basic tank dress v2 
Basic Tank Dress V2

I had a major photo session this weekend (lots of wine and some quality time with the self timer on my camera) and I think I've got everything photographed that  I've made up until the six month point. Today, the dresses. Tomorrow, the rest of it. I did full photo sets for all of the garments so some (if not all) will get their own blog posts at some point. Let me know if you would like to hear the details on anything specifically, otherwise I suppose I'll just choose at random. I'd also like to make sort of a "projects" page that would have a thumbnail photo of each garment and a link to that garments full write up. This would be mostly for my reference, but might be useful for others as well. Anyone have any clue how to do that in blogger?

And for the SIX month grand tally:
29 finished objects for ME
3 finished objects for OTHERS  

I'm only counting the wearable stuff here, there have been a few wadders. And trust me, the wearable stuff gets worn most days.  I'm quite pleased with that fact, since I started sewing so that I could create the garments that I've always looked for in stores but have never been able to find. For example, jersey knit dresses with sleeves? Now I have seven (seven? wow!)!
 
Also, don't forget to drink your champagne! Bottoms up, ladies. 


 signature2