Thursday, March 7, 2013

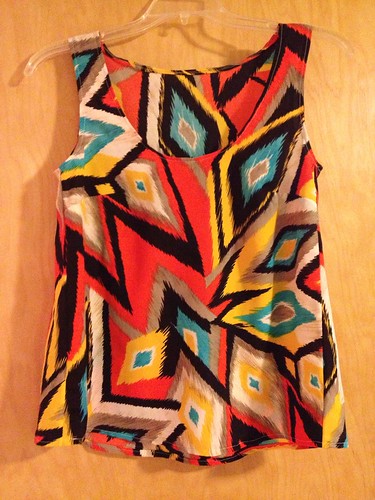
Finished: Grainline Studio Tiny Pocket Tank V 1.0 (and bonus V 2.0)

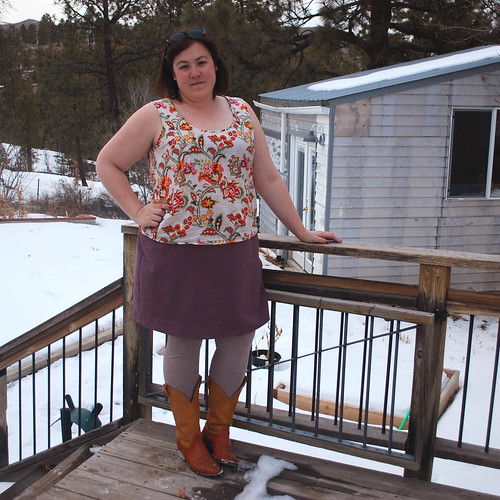
Tiny Pocket Tank Brown Skirt

Sweater: Anthropologie
Shirt: made by me, pattern: Grainline Studio Tiny Pocket Tank
Skirt: made by me, self drafted
Leggings: made by me, self drafted from Etsy tutorial
Boots: Vintage, Etsy
 
Whoa, this is a blast from the past. Don't worry, we don't have this much snow on the ground now!! I'm playing catch up here. This shirt was the second thing I made and now that I've blogged about it, I've covered the first, second, and third me-made items and the progression of things is a bit foggy after that so you can expect any sense of order to get thrown out the window!

Tiny Pocket Tank Front

Being the second thing I made, this one was fairly straightforward. Plus, I don't really remember what happened! So just enjoy the photos.....

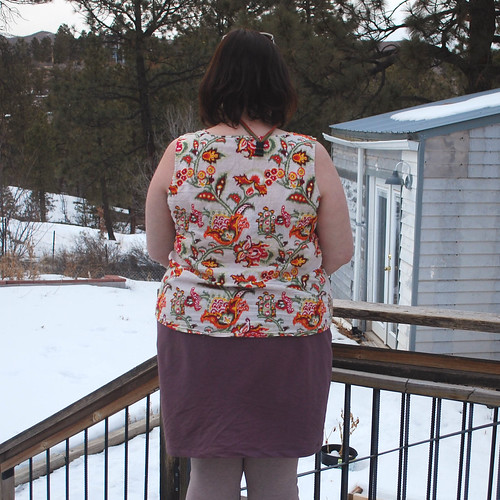
Tiny Pocket Tank back

I had this fabric in my stash for a while. I think I bought it in the clearance bin with the intent of recovering the throw pillows on my sofa, but never did it because it was really just too lightweight for pillows. That made it perfect for this shirt! It almost has a linen like texture and I LOVE LOVE LOVE the print. Seriously. Love. 

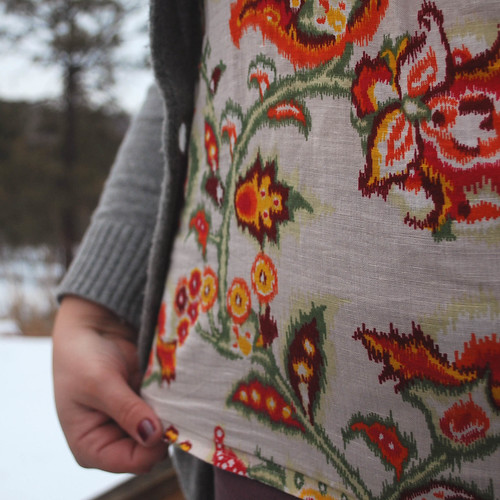
Tiny Pocket Tank pattern detail

I cut a size 18 on this one, and like the Scout Tee pattern, it was a little small through the hips. Thats ok, I still wear it all the time anyways. Because I love the print. Obviously. Next time I think I will grade it out a little through the hips and make it a tiny bit longer. This fabric tends to wrinkle up pretty badly while I wear it, causing it to get shorter throughout the day and causing me to have to iron it before I put it on in the morning. Ironing is really NOT one of my favorite morning activities. In my list of favorite morning activities, it falls significantly behind enjoying a shower, drinking tea, and sleeping an extra 5 minutes because I don't have to iron.

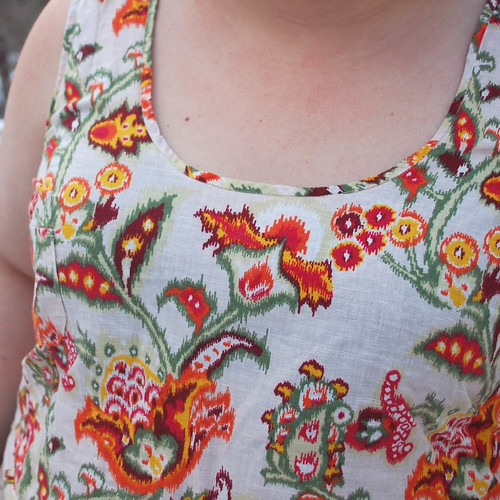
Tiny Pocket Tank neckline

I botched the neckline a bit, I think I had seen too many Sorbetto's with the visible bias binding and thought that was what I was aiming for even though the directions in pattern were very clear. The next time I used bias binding on a neckline I consulted Jen of Grainline Studio's tutorial, and it went much more smoothly (though trust me, I'm still working on this technique). Speaking of the second time I made the Tiny Pocket Tank....

Untitled

Here is an awful photo of the version I made for my sister for her birthday back in November. She swears that she loves it, but I haven't seen her wear it yet. But maybe that's because she lives in Florida. 

All in all, I count this pattern as  win and I see quite a few more in my future. I don't wear a lot of things without sleeves (until it gets unbearably hot in the summer and I throw my sleeves required rule out the window), so I was skeptical about how much use this would get. As it turns out, its a FANTASTIC layering piece!


 signature2

Monday, March 4, 2013

Feeding the Habit

Well, I know its VERY popular in the sewing world right now to discuss your fabric stash busting plans and how you are going to use up all that fabric that's been hiding in boxes/closets/shoved under your bed in big wads. However, always the crazy person innovator, I've decided to buck that trend. BRING ON THE STASH!!

Seriously, though, I've only been sewing for a few months, the closest fabric store is an hour away, and I just bought a lovely new piece of furniture that needs to filled to the point of busting immediately. Plus, when I want to sew, I want to sew NOW and a two hour round trip to the fabric store is out of the question.

So, I took major advantage of the McCalls/Butterick/Vogue $1.88 pattern sale last week and stocked up. As you can probably tell by reading my blog, I've mostly been sewing pattern from independent pattern companies, so I hope I'll be able to figure out how to interpret the less detailed instructions that these patterns will likely come with. I think you will see a theme here: basics, comfy, and can be made from knits!

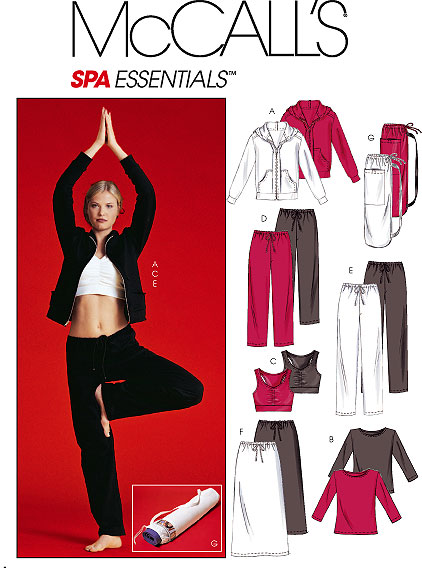
McCall's 4261 was bought mostly for the hoodie. Must have more hoodies in my life. And yoga pants never hurt either.

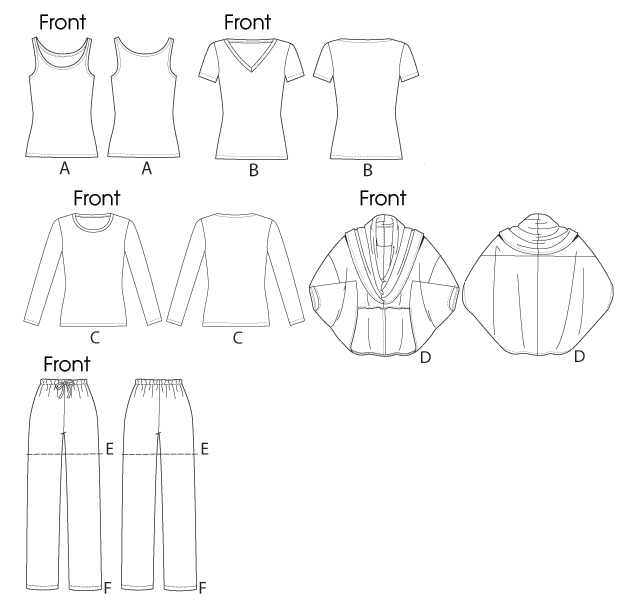
McCall's 6658: Need a t-shirt pattern. I could buy the Renfew that everyone loves, but then I would have to grade it. And this pattern was less than 2 dollars, so I'm going to give it a try first. I am aware that there was a basic t-shit in M4261 above, but I was blinded by the price tag!


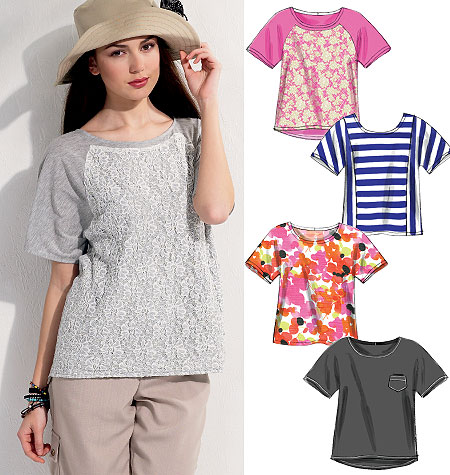
McCalls 6566- Whoops, more t-shirts. But they are so cute. And Susan at Moonthirty made an awesome version and I pretty much need to copy everything she does. And, surprise! The pictures on McCalls website are wrong and the back options are amazing! Thanks for the scan, Susan! This is on my to-sew-immediately (like, tonight) list.

McCalls 5974 was a no brainier. Tons of options, all look super cute, and great reviews! 
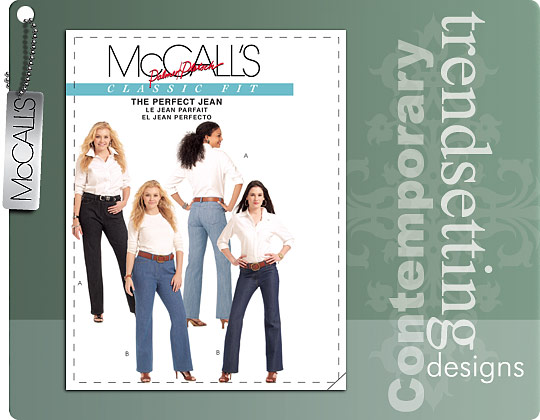
Jeans?!? I figured McCalls 5894 was worth buying for less than two bucks because it seems to be one of the few plus size jeans patterns around. I figure I'm going to need all the help I can get once I muster up the courage to attempt jeans, so the more patterns the better!

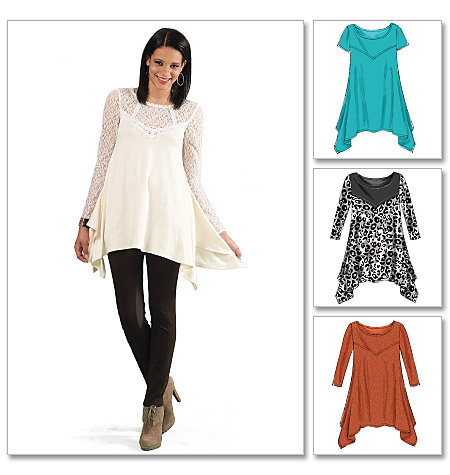
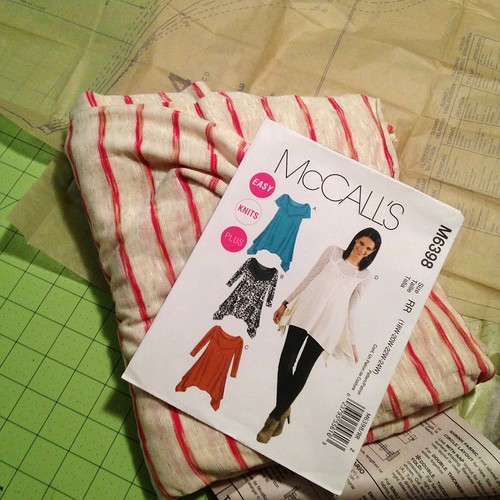
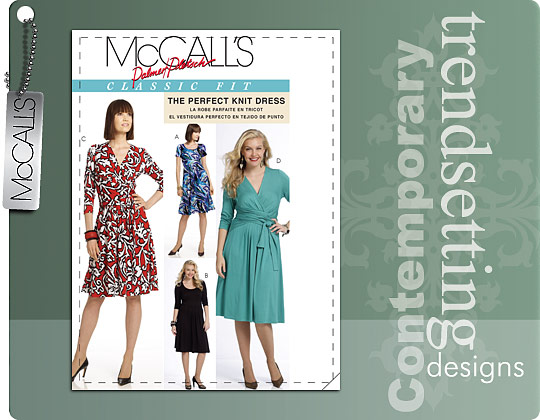
 I went out on a limb a bit with McCall's 6398. I love the drapey style, but there were only two reviews on pattern review so I wasn't sure what I was getting into. Plus I HATE the version the model is wearing above. Spoiler alert: I made this one over the weekend and I love it! I'm wearing it right now. Photos forthcoming.

McCalls 6553 was another risky choice. Strike that, nothing is risky for two bucks! Plus, I thought Ginger Make's version was super cute, especially when belted, and looks perfect for when it gets unbearably hot this summer.
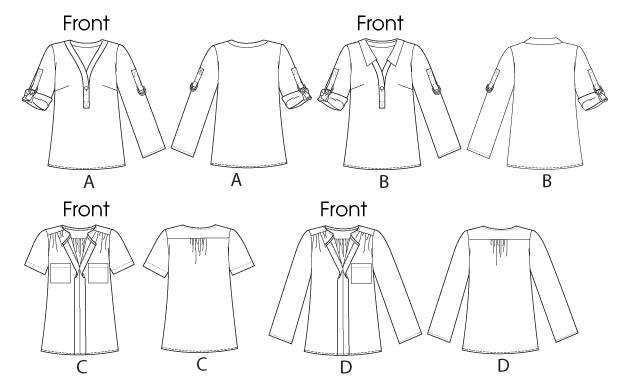
I haven't seen any reviews for Butterick 5826, which made me a bit skeptical, but I looks like a great basic blouse/ tunic. I'm not much of a traditional blouse type of girl, but I am totally down with this style for something a little fancier than a t-shirt.
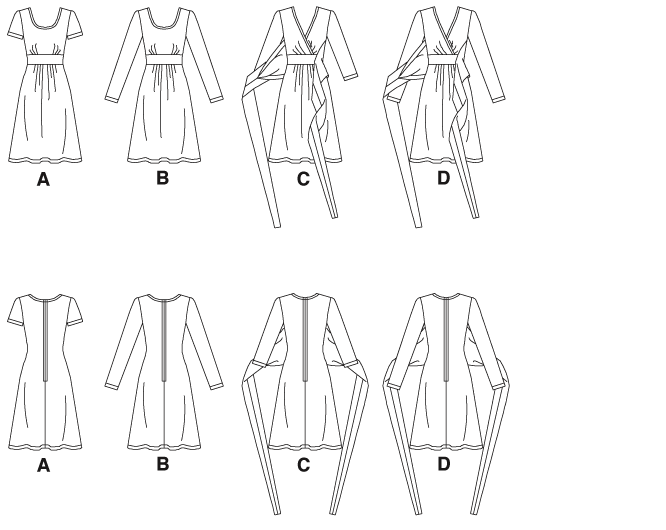
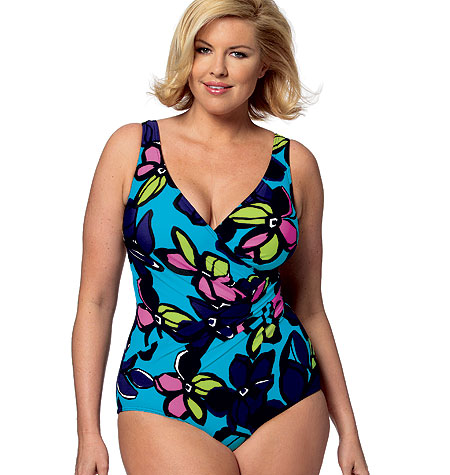
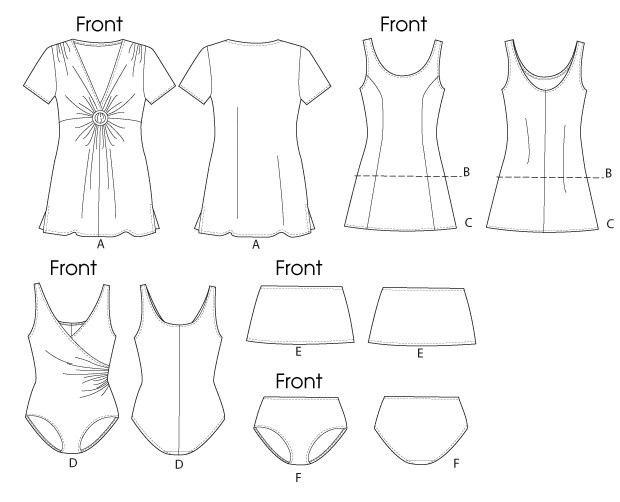
I bought Butterick 5795 simply because the model looks so damn va-va-voom in the photo. Plus, if I ever wrap my mind around making a bathing suit, this is the style I would like. I just hope the instructions are good!
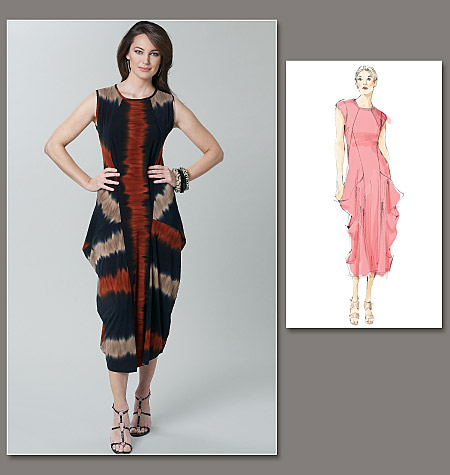
I am super excited about Vogue 1234. I hope I can make it work!


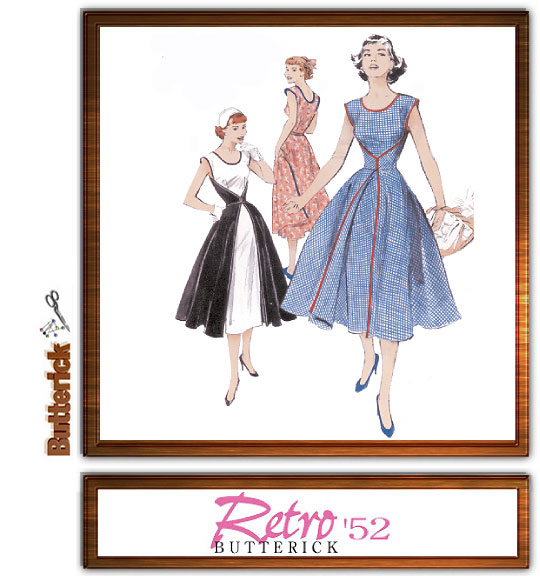
Buttern 4790 has some very negative mixed reviews. That said, I couldn't pass it up. Its so damn adorable and retro!

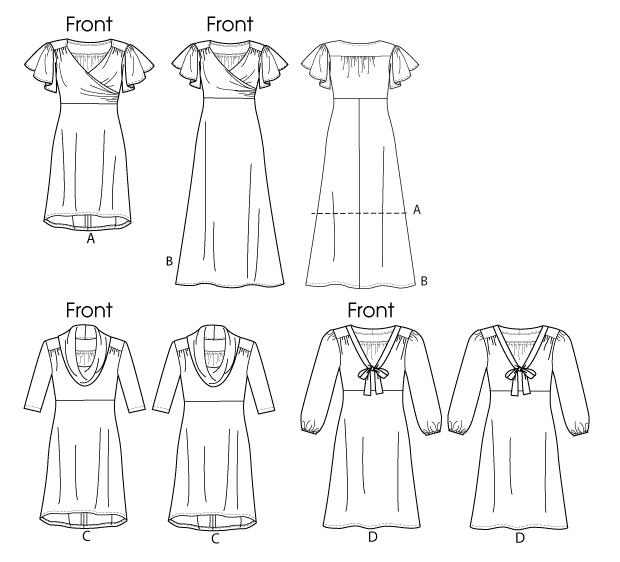
And, finally, Butterick 5794. Another no-brainer. Several cute options and can be made in a comfy jersey. Bring it on!

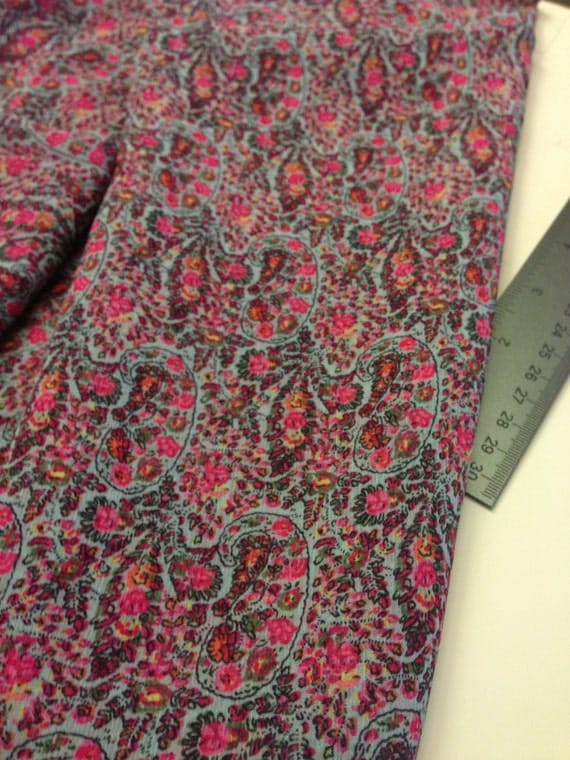
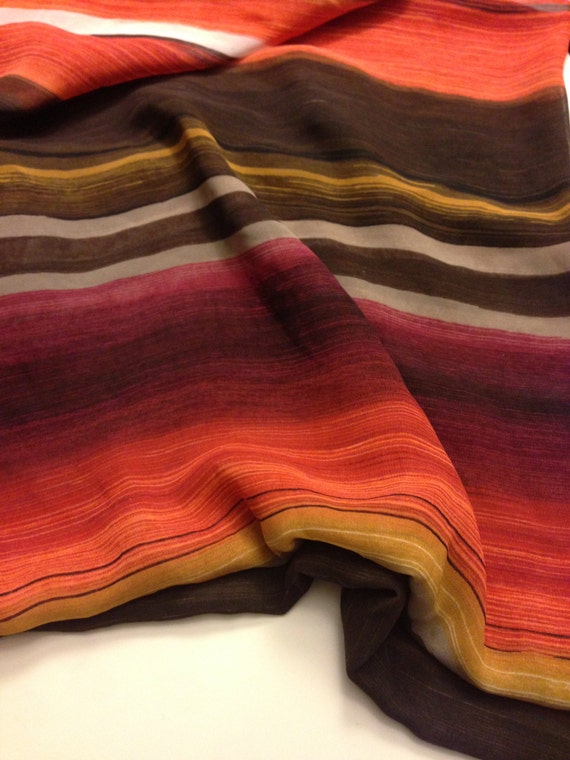
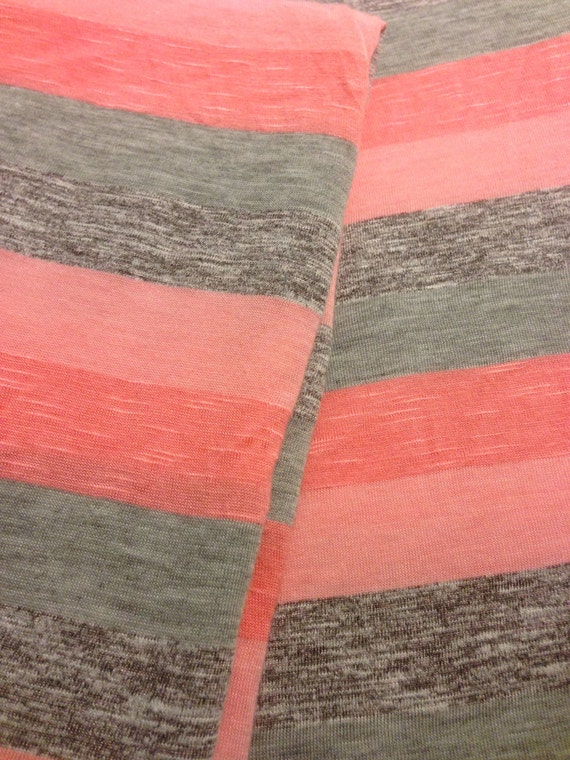
After all that hard work spending money at the pattern sale, I hopped on over to my favorite Etsy shop FABULACE and bought some fabric so that I could get down to sewing as soon as both packages arrived.


 (photos from Fabulace)
The fates obliged, and last Thursday both the patterns and the fabric were delivered to my door. Although I had a very busy weekend of partying at our local ski hill, throwing a party myself, cleaning up before and after said party, and watching movies in bed while hungover, I did manage to squeeze out one garment.

Here is your preview of coming attractions:

Untitled

For less than 70 bucks combined, these new patterns and fabric should keep me busy for a couple of months (or at least one month?). SO EXCITED!

So tell me, how was your weekend? And, did you buy any exciting new patterns in the big sale?? And, what should I make first?

 signature2


Wednesday, February 27, 2013

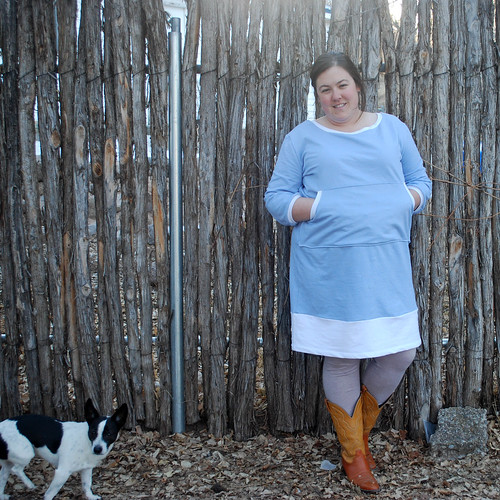
Stretch and Sew V 1.0 a.k.a the Sweatshirt Dress


 sweatshirt dress

Dress: Made by me, Pattern: Stretch and Sew 305, Fabric: French Terry
Leggings: Made by me, Pattern :Etsy blog DIY leggings tutorial, Fabric: Jersey
Boots: Honey Blossom Studio on Etsy

 One of the items of clothing that I have been searching for FOREVER is a sweatshirt dress. I mean, a sweatshirt dress sounds awesome, right? You can wear it around the house on Sunday when you are doing your cleaning and its almost respectable enough to wear to the grocery store. Its great for long car rides in the winter and lounging around the ski chalet shack when on ski vacation with friends. Its probably even great for the airplane! And yet, for some reason, NO ONE makes a sweatshirt dress. Or rather, if they do make a sweatshirt dress its too short or too small or sack-like (and literally a thousand dollars) or too ugly or actually just a sweatshirt that someone is trying to pass off as a dress. Trust me, I have been looking for the elusive sweatshirt dress for a VERY long time. 

But now... now I can make one! Hurray! And when is stumbled upon this dated, ugly ass retro pattern at the local thrift store for 30 cents, I figured I would give it a shot. Its the 1977 special: Stretch and Sew 305 and I haven't found any reviews or info about it on the great, wide interwebs. And if I can't find it on the interwebs, that means I'm the only person who has ever sewn this pattern, right? That's what I'm telling myself, it makes me feel adventuresome and special. And helps me excuse my mistakes!

Thrift finds

Sorry for the shoddy photo, here is a scan from Vintage Patterns Wikia.And, if you are so completely green with envy over my dress that you need your very own NOW NOW NOW, there are conveniently a few patterns for sale on Etsy right now.


 See, this pattern contained everything I wanted, but not everything I wanted all in one version! I NEEDED a pouch pocket on the idealized version on my sweatshirt dress that was currently only residing in my brain, and I definitely did not want a cowl neck. I am not a cowl girl. Also, it needed a bit of grading up (story of my life). So, I added about an inch at the center seam (since the pattern is cut on the fold, this is the easiest way to add just a bit of width to the pattern: just line the pattern piece up on the fold then move it over an inch). Unfortunately, as is common with many 70s dresses I saw in my vintage clothes selling days, the top and the bottom are all one piece with an elastic casing around the waist. This means that to accommodate my badonka donk, I had to grade up the entire pattern piece, rendering the top section of the dress way too large. I guess it would have worked if I was going to for that late 70s blousey look the lovely ladies on the pattern envelope are sporting, but that didn't end up working too well with my fabric of choice. Lets keep track here: Mistake 1.

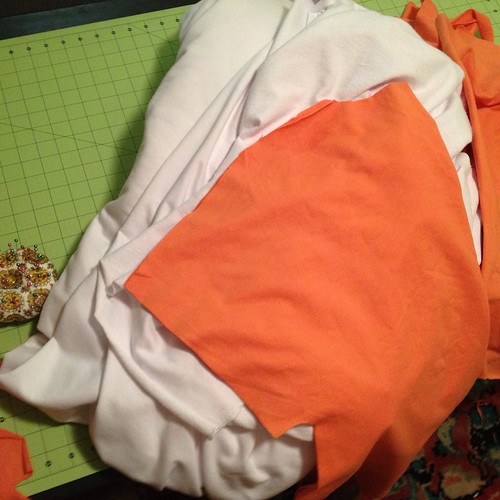
Speaking of my choice of fabric, did I tell you about this ridiculous mound of white french terry that I purchased in the discount fabric district in Dallas for $3 a yard while visiting my parents at Christmas? No? Well, here it is (with some of it dyed orange). Its even too large to fit in one photo!

Untitled

I'm not entirely certain what I thought I was going to do with 9 yards of french terry, but $3! per yard! what! I couldn't pass it up. And I am slowly trying to work my way through it. Turns out it doesn't hold dye as well as I thought it would, though. This dress was supposed to be navy. Yeah. Mistake 2.

Anyways, back to the sewing saga. Well, in the process of distracting myself with the VERY CHALLENGING grading, I accidentally cut the front neckline on both the back and front pieces and quickly realized that I was screwed. Mistake 3. Fortunately I wasn't planning on using the cowl neck anyways. 
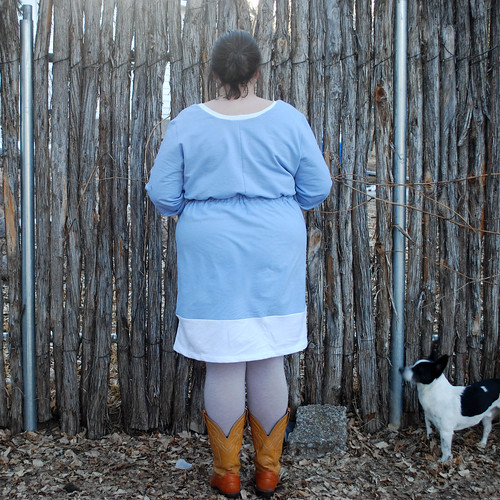
sweatshirt dress back

Following the directions, I applied the binding to the edges of the pocket and stitched, folded over, and top-stitched the top part of the the pocket. The directions only allow for the pocket on the shirt version of the pattern, with the edges of the pocket being sewn up in the side seams and the waistband. I figured I could top stitch those down later, using a regular old sweatshirt as a guide for construction, but I had to apply the casing first to avoid creating a catastrophe. At that point, I serged the shit out of the side seams (it still feels very dramatic when I use my new serger) and tried the thing on. Yeah, way too big on the top half ( a result of Mistake 1) and the back neckline was way too low (a result of Mistake 3). Here is where I started fixing things. I sewed a massive dart (about 2 inches wide at the top) down the center back to the waistline. Hopefully it just looks like a center back seam. It helped massively with the fit through the shoulders and removed some of the blousey-ness through the bodice. Its still a little big in the front, but trust me, its a MAJOR improvement. 

sweatshirt dress pocket

I applied the casing and elastic as directed and then finished up the pocket by sewing down and top stitching the sides of the pocket and then the bottom of the pocket. The pocket is pretty wide and I would venture to say it would look better if it was a bit less wide, but I was OVER it at this point. I tried the dress on again and guess what? It was WAY too short! Mistake 4. 

Well, at this point I was ready to embrace the "make it work" moment. I was out of the pre-dyed "navy" fabric, but fortunately I still had at least 6 yards of that white french terry laying on my floor. Good thing color blocking is trendy right now! I cut out a nice long panel, sewed it on to the bottom of the dress, and then hemmed it up to a length I liked. My serging skills are a bit lacking so the side seams at the the intersection of the panel and the dress are a bit wonky. I finished things up by applying knit binding made of the white french terry to the sleeves and neckline and the put a fork in it and called it done!

 sweatshirt dress side

By some miracle clearly contrived by the sewing fairies, I managed to end up with a wearable finished project that ticks most of my sweatshirt dress boxes! I have indeed worn it to clean the house and go to the grocery store and will be certain to wear it on my next ski vacation. I haven't washed it yet, so I'm keeping my fingers crossed that the dye job doesn't run or fade too badly. 

And that, my friends, is the saga of the sweatshirt dress. Whew!

 signature2

Tuesday, February 19, 2013

Finished: Green Pepper F700 V1.0

Untitled

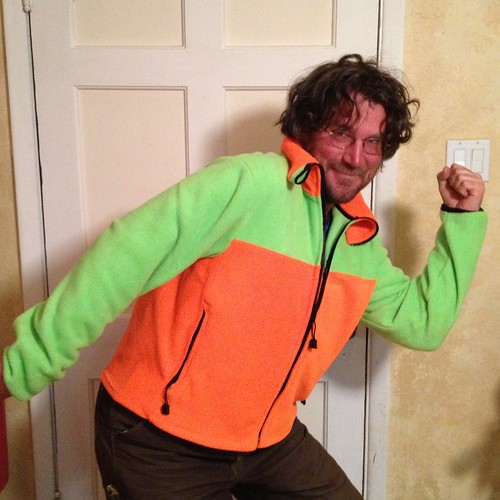
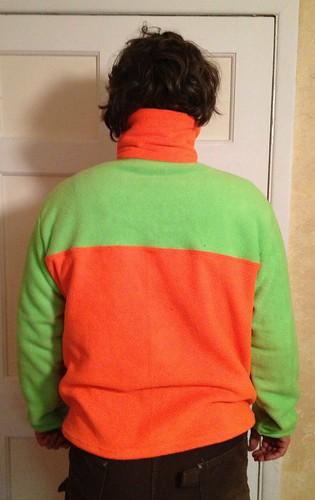
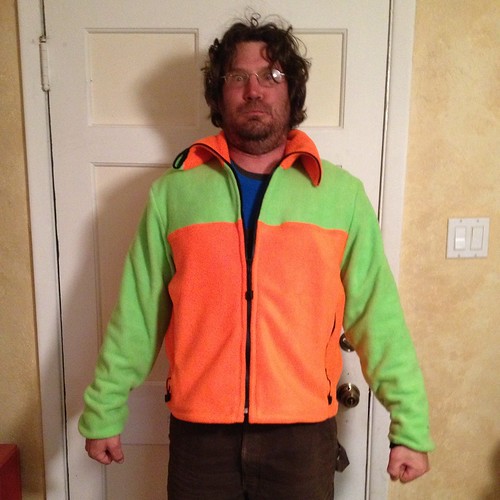
Finished! Green Pepper Patterns F700. This was QUITE a project! Lots of steps and pattern pieces and zippers and alterations, at least more than I am used to. However, the intended recipient was quite pleased- as evidenced by the demonstration below of how the jacket will look when he takes it on its first tele skiing outing to Canada in a couple of weeks.

Untitled

I'll go ahead an apologize for the photos- my friend wanted the jacket in his hands as soon as it came off the sewing machine and he couldn't wait ONE SECOND longer. Hence, the after work, kinda fuzzy, hat hair, insulated carhartt wearing, iphone photos. Plus, as I'm sure ya'll know, those of the male persuasion can be a bit impatient when it comes to modeling! I think you can get the idea anyways. 

UntitledUntitled 

This project was conceived of when said friend found himself in the unfortunate situation of having to accompany me on a trip to the fabric store. When all of the errand running is an hour away, you often find yourself going to the big city moderately sized metropolis (Santa Fe, for those of you that don't know, is only considered a big city by New Mexico standards) for lunch or dinner and then running all sorts of strange errands with other people. I have accompanied this particular friend on many trips to the guitar store and the ski shop, just so that I could have the Thai food reward at the end of the journey. 

ANYWAYS, I was just planning to run into the fabric store to pick up some fabric for my mother's (yet unfinished) birthday present. We emerged and hour and a half later with this Green Pepper pattern, way too much fluorescent green and orange fleece (half off!), and three water resistant zippers. I'll have you know that this was TOTALLY his idea, apparently he has been wanting an incredibly ugly, fluorescent  fleece for a long time (I think he is reliving his high school experience in the late 80s). However, I was super enthusiastic about the project, what with the claims I have been making about learning to sew outdoors gear. Plus, I owe the guy quite a few favors, he has helped me move twice,  assisted with the construction of a few projects, and always drives my drunk ass around when needed!

Untitled 

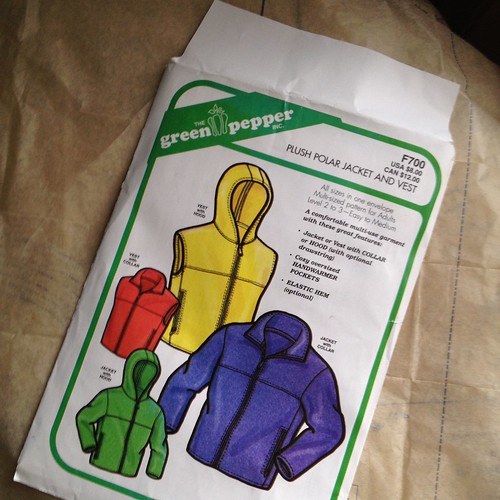
Sorry IN ADVANCE for all the ad nauseam details, but I had a hard time finding any info on this pattern, so I want to have this a reference for both myself and for anyone else looking to use this pattern or the updated Green Pepper 507. The directions were fabulous. Actually, let's be honest, they were clearly designed for some dude who was taking his first turn at the sewing machine without his mother/wife's assistance, which was perfect for me because I have never made anything like this before. 

I think this is an out of print pattern, its not listed on Green Pepper's website and their pattern numbering has changed. The Plush Polar Jacket and Vest seems to be the updated version of this pattern, and it looks like it has a few more professional finish options. After reading a few reviews of the newer version on Pattern Review, I incorporated some of the finishes into the jacket. I don't know how long this pattern was sitting on the shelf at the fabric store, but I can't find any info about it online and it does have a bit of a retro look. We measured my friend and according to the pattern, we should have cut an XL. A little judicious pattern measurement suggested that we cut the size L instead, and it ended up fitting just like he wanted. We added two inches to the length through the torso and two inches to the collar height (at his request) to accommodate a 28" zipper instead of the suggested 24" zipper. FYI, I think it would have looked and functioned better if we added four inches to the torso length instead, but that is NOT what he wanted! Either way, this pattern is SHORT (he is about 6 feet tall). He also requested that we carry the color blocked yoke onto the back of the jacket. The original pattern has a solid colored back. This was easily accomplished by slashing the pattern at the same height as the yoke on the front of the jacket and adding a seam allowance. 

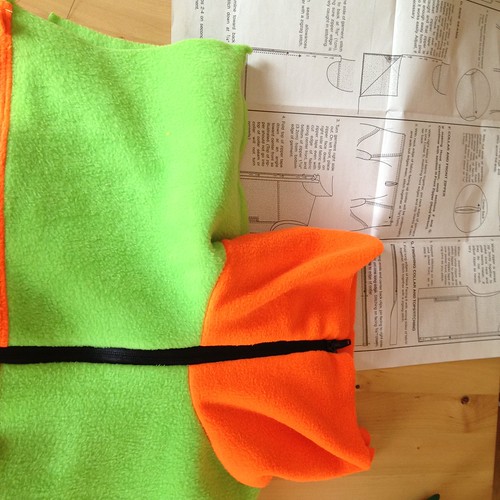
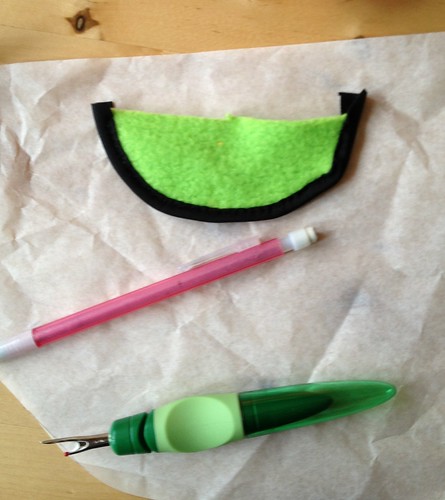
The only other request my friend made was that I include a zipper guard to keep the cold zipper pull off his face when the jacket is zipped all the way up. I did a little improv on this one. I didn't find too much info online, so I looked at a couple of my own jackets and came up with this. 

Untitled

I cut a half circle shape out of the fleece, edged it with Italian nylon lycra from Seattle Fabrics, and sewed it into the seam allowance at the top of the zipper. You can see the water resistant zipper nicely here, we picked this up at the fabric store and I think it looks a bit more professional than a regular zipper. You can also see my kind of shoddy topstitching- I used a 4 mm double needle and tried to use contrast thread, though it ended up that you couldn't tell at all because the thick fleece covered it up.  

Untitled

I also ordered some Groovy Zipper Pulls from Seattle Fabrics and got some 1/16 inch cord at my local fabric store to make zipper pulls. Its pretty hard to grab that tiny zipper when you are wearing gloves! I can't believe I forgot to take a photo of it, but I added the nylon lycra to the bottom of the sleeves following this tutorial (using the steps labeled "lycra" at the bottom of the page). I think this step really added a more professional finish; rather than just having a straight hem at the sleeves which would allow them to hang over the hands, or a band of elastic which can be tight, the lycra keeps the ends of the sleeves resting lightly above the hands. The lycra binding is what you see on the jackets made by companies like Patagonia, so it was important for me to give it a try. Surprisingly, it worked quite nicely!

Untitled

Yes, the collar looks ridiculous when unzipped! But he likes it! (BTW, I'm assuming this is the face that some of your children make when you try to take their pictures. Some men never grow up!)

There are a few changes I might make next time. The pattern calls for two layers of fleece on the lower front, which are used to make a pocket that extends from the seam across the chest to the bottom hem. I've seen this construction in some professionally made jackets, but the inside piece is a mesh or lightweight nylon instead of fleece. I think this would reduce bulk and make it much easier to sew. My sewing machine did not like top stitching through 4 layers of thick fleece! I've added a small zipper guard at the top of the zipper, but most jackets have a zipper guard that extends all the way down the length of the zipper, to keep that cold zipper off your body. If I can figure out how to do it, I'll extend the zipper guard next time. Also, I'd like to lady-fy this pattern for myself. Obviously the first step will be to pick a more appealing color palette, but the second step will have to be altering the pattern. Has anyone lady-fied a men's pattern before? Any tips?

Whew, if you've made it this far you probably deserve a jacket yourself! I'll take your requests in the comments... or not! 


  signature2

Friday, February 15, 2013

Exciting news from around MY blogosphere!

The amazing thing about the blogosphere is that MY blogosphere isn't necessarily YOUR blogosphere. The blogosphere is so customizable, and for every interest you might have, there are a million (or so it seems) blogs that you can follow. In that light, I thought I would share two exciting things that popped up in my google reader this morning, just in case they didn't pop up in yours!

The New Vintage Lady just announced that she is doing a sew-a-long for her new and totally adorable plus- size vintage bathing suit pattern.


Seriously, are her graphics not the most adorable thing ever? Unfortunately, it only comes in one size, which is NOT my size! She says she plans to cover grading in the sew-a-long, so I'm going to to wait to see how hard it looks before I buy the pattern. I wonder if it must be made in a woven or if I could do the retro style in a modern bathing suit fabric...hmm...


I've had my eye on NVL's bra and tap panties pattern for a long time (way before I started sewing). I'm thisclose to clicking the purchase button on this one (plus, its really close to my actual size, less grading required!). Has anyone worked with NVL patterns before? I'm wondering if I would be getting in over my head with my beginner skillz.

In other news, I recently purchased the Alabama Studio Sewing + Design book from Alabama Chanin. If you don't know about Alabama Chanin, then you are missing out! They make beautiful, beautiful had sewn garments out of organic cotton jersey that they sell for millions of dollars (ok, hundreds maybe). Both their design aesthetic and their effort to operate sustainably while supporting local craftspeople are very inspirational. Their journal (i.e. blog) is beautiful and thoughtfully written.  And, get this! They are based in my father's hometown of Florence, Alabama.


Hundreds or millions, either way its out of my price range! I just recently discovered that they have been launching a major DIY effort over on their website- they have three books, fabric, notions, and even kits available for purchase. I've been getting acquainted with my new book (very slowly) and am working on a couple of shirts, one of which you should be seeing here shortly. I find that the hand sewing to be quite enjoyable- and its keeps my hands busy while I'm watching some guilty pleasure TV like the new season of Downton Abbey or (even worse), the new Carrie Diaries on the CW (seriously, am I too old to watch high school soap operas? WHATEVER). 

Untitled

Well, just this morning, they announced on their blog that they are launching a Craftsy course called Hand Embellishing Knit Fabric. Color me intrigued! While the book is fabulous, not much compares to seeing techniques in live action. It sounds like Natalie is going to be covering a wide variety of techniques, some of which seem positively overwhelming when you read about them in the book (reverse applique, anyone?). I'm definitely considering this course!

Well, that's the news for now. From my blogosphere to yours. Is anything happening in your blogosphere that I need to know about? Have a lovely Friday!


 signature2