Showing posts with label DIY. Show all posts

Thursday, December 17, 2009

This Just Upcycled!

I've been working long and hard upcycling this dress, I just finished it, and had to share with ya'll. If you like it, its listed in my Etsy store! When I found this dress at the thrift store, I could see that it had a lot of potential, even though it kind of looked like a sad sack of navy blue fabric. Here is the before:

DSC_0129

And, here is the finished product! I especially love the colorful belt, which I made from fabric salvaged from a hideous pair of 80s pants.
New Upcycled Dress!

New Upcycled Dress!

New Upcycled Dress!

Here is a little DIY list of what I did to upcycle the dress, hopefully it will inspire you to refashion something in your wardrobe that isn't working for you! Some of the things I did were a bit more complicated, but even using a few of the simpler tricks can really make a huge difference to a garment that you aren't wearing because there is something a little off about it.

1. Add an elastic waistline- it will define the waist of the garment and make it much more flattering! The obvious choice is to do this to a dress- but maybe you have a sweater or a shirt that you like to belt. Adding an elastic waist will achieve the same effect. This is super easy if you have a sewing machine. Just buy some elastic at the fabric store and be sure to use the zig-zag stitch on your machine (check your manual). While you are feeding the fabric and elastic through the machine, let the fabric of the garment go in flat while you stretch the elastic out as tightly and you can. Once you are done with the sewing and let the elastic relax, it will gather up the fabric of the garment and give it a more tailored look.

2. I added a bubble hem to this dress, but an easier fix is just to hem a dress or skirt to a shorter length. I have a lot of older and vintage dresses in my closet that hit at an awkward mid-calf length, and I bet you do too. The just above the knee length and the mini length are super popular this season because they work so well with tights and leggings. Hemming is easy to do, even without a sewing machine. Just hack off the dress or skirt about 2" longer than you want it to be, then create a french hem by double folding the fabric up to hide the raw edge and hand stitch it up there using a whip stitch!

3. I created a belt with a big rosette out of fabric that I salvaged from a pair of really awful 80s pants. There are no rules here! If you see some fabric that you like but you don't like the form that its in, make it into something else! Just get creative!

If you have any questions or want more detailed instructions for something, just let me know. Maybe I'll work on a tutorial if there is some interest.


Sunday, September 6, 2009

DI-Dye

I did a little dyeing project this week. It was really fun! I wanted to upcycle some vintage slips into colorful slip dresses. I have a few of these that I have bought from other Etsy sellers and I really love them. I know a lot of people wear them as dresses, but I also like to use them for layering under dresses to add color and prevent static cling! Dyeing synthetic fabrics is always a bit of a challenge but as long as you don't aim for an exact color, the results are always a fun result! For example, the first color I tried was blue but I ended up with a nice chartreuse. Oftentimes the stitching and embroidery also ended up a different color from the slip itself, which made for some interesting color combinations! Here is a step by step of what I did in case you want to try this out for yourself. Please note- I'm no expert! Trial and error is my modus operandi.


The raw materials were vintage slips that I thrifted (I started with a camisole in case I messed it up) and some direct dyes. Don't forget the instructions!


The next step was to boil a large pot of water with salt added. I also prepared the dye on the side in a jar- I mixed the red, blue, and yellow colors to get green and orange. For some reason I couldn't get the blue color to work very well, but the red and yellow shades came out great!


Next, I added the dye to the boiling water. This was the blue dye- which didn't work at all!


Next I added the slip to the dye mixture. I had to stir CONSTANTLY for 20 minutes as per the instructions, however I think that when dyeing synthetic fabrics like these slips the color either takes or doesn't take within the first 2-3 minutes. I tried some shades of orange and red after the blue was a total failure, which I think turned out beautifully!


About 10 minutes in, this slip had turned a lovely shade of peach. I used stainless steel accouterments and they were not affected by the dye at all. The dye mixture stayed at a simmer during the entire dyeing process.


Here are the slips hanging dry in the shower. I neglected to photograph the last few steps, but after they finished simmering to perfection I rinsed them out in cold water and then washed them all in the cold cycle in my washing machine to get out any excess dye and hung them up to dry. I love how the colors turned out! They are up for sale in the shop now, so if you want to see the finished project click here! I think I'll be making some more of these soon (if they sell) because they are so fun!

Wednesday, September 2, 2009

Upcycled Nautical Daydream Dress

I'm soooooo excited to be offering the first dress in my line of up-cycled clothing! What is up-cycling? It's reusing vintage and salvaged materials to make something beautiful and new. It's environmentally friendly because it keeps old clothes and scrap materials out of the landfill and no new materials are produced. Yay! In fact, the only new material in this dress is the coral colored ribbon that makes up the back of the belt. Here is a step by step guide to how I made this dress:


I started with a vintage dress which was sort of so-so but had a lot of potential. I also bought some remnant lace at the local fabric store. I wanted to use salvaged materials, so I got lace that was left over. I had to hand cut it all out and pieced some of it together, it took forever but it was worth it to know that I was using material that would have otherwise been thrown away.

After that, I hemmed the skirt to a length that is a few inches above knee length and made the sleeves into cap-sleeves. I also removed the grandma like collar at the neckline. I think this made it a bit more modern and much more flattering!


I then added the lace to the sleeves and hemline of the dress. Lace makes everything more lovely!


To finish the dress off, I created a belt out of vintage buttons, lace, and a coral colored ribbon. This gives the dress more color and the lace ties everything together nicely.


Here is the finished product! It was quite a bit of work but I really like how it turned out. It's up for sale now at Green Violet Vintage. I can't wait to make more upcycled goodies- its a great way to make something old fresh and new again! Hopefully I've inspired ya'll to get creative with your clothes also. If something you own isn't working for you, make it better. Simple fixes like hemming and adding embellishments can really make your clothing stand out in the crowd!

Tuesday, August 25, 2009

Thanks!!

Thanks for all the love on the dress, ya'll! To answer a few questions: no, I didn't use a pattern or a dress form. I just tried the dress on A LOT while I was working on it and refashioned the top part probably two times. I sew like I cook- I make it up as I go and I use only what I have on hand (too lazy to go to the store mid project!). This results in some strange meals and strange clothing, but I kind of like it! It keeps things interesting.

Anyways, with all the love I've already started in on a few new upcycling projects. I'm almost done with the first one but my room mate was working overnight at the hospital (he's a doctor) and now he is sleeping and I don't want to run the sewing maching and wake him up! But, it should be done soon and I'll be sure to post about it here, hopefully later tonight. And, as much as I would like to keep all these projects for myself, my closet and my wallet can't afford it, so they will be up in the shop for sale!

Sunday, August 23, 2009

The best thing I've ever made!

Hands down, this is certainly the best thing I have ever made... here it is from start to finish!


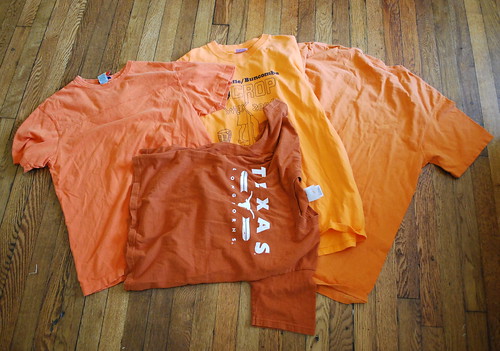
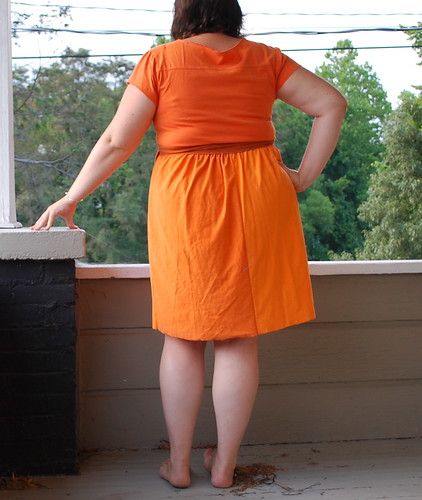
The raw materials- four t-shirts I bought from the goodwill clearance center. I decided to go with an orange theme. I got one t-shirt that fit well on the top so that I wouldn't have to do too much fashioning of the bodice since I really don't know what I'm doing. That's the light orange on on the left.

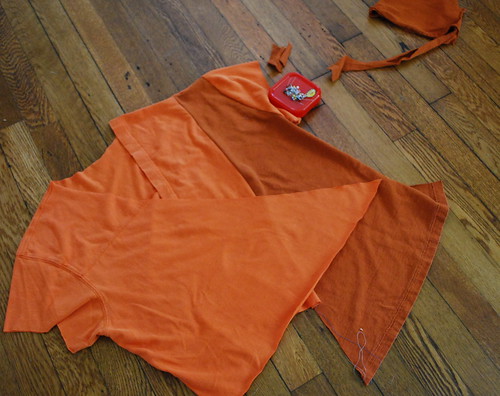
Fashioning the bodice. This took a while since I'm kind of clueless about sewing and what not. I took it apart and put it back together several times.

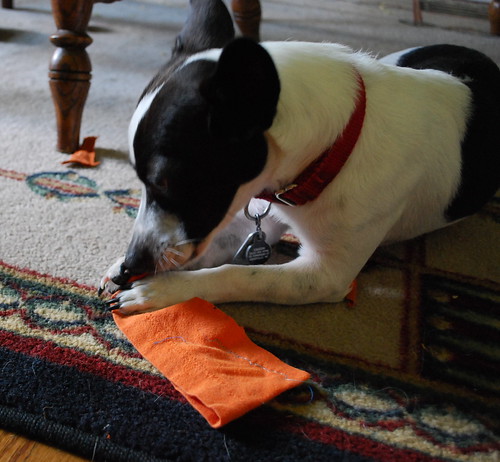
Petey loves it when I sew because he gets to chew on the extra fabric. Petey is a machine of destruction!

I'm almost finished here, it was pretty easy to make the skirt. I just got as much material as possible out of the two remaining t-shirts, sewed them together in one big piece, and gathered the top! I then connected the skirt to the top with the waistband.

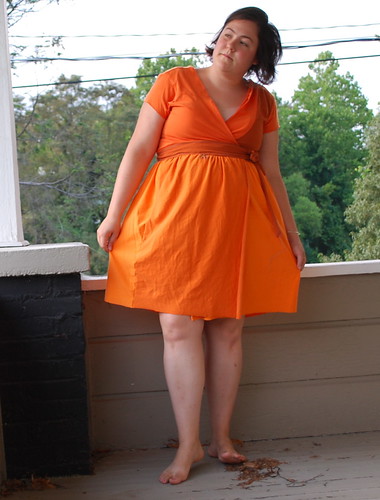
Finished product! yay! I'm really please with how this turned out!


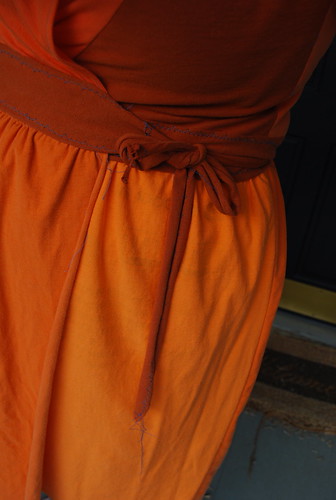
You can see the contrast stitching that I did in teal- mostly because I didn't have any orange thread. But I like how it turned out.

This was a super fun project! I'm really glad that I could finally jump on the up-cycling bandwagon. Don't be intimidated by sewing- clearly I had no clue what I was doing and it turned out great. All it took was a little envisioning on the front end and a few attempts to get it right. Go on, try to make something!

Wednesday, August 12, 2009

A little DIY project

Yesterday while I was thrifting, I came upon this unfortunate piece of furniture. It wasn't much of a looker, but it did seem to be well constructed, it was made of actual wood, I did need a bedside table, and it was only $8, so I bought it.


I decided I would try to make it look a little nicer but I didn't have much of a plan. So I started sanding.


After doing a half-assed job of sanding, I assessed the paint and stain options I had lying around the house. It was looking like white or red were my only options. Because I used the red on a dresser thats in my room, I decided it would be a bit too much if I used it on this table also, so I settled on the white. Except I decided I wanted to 'whitewash' it. Except that I have no earthly clue how to whitewash and my only knowledge of whitewashing is from Tom Sawyer (or is it Huck Finn?). I figured I would just mix some white paint with some water and see what happened.

As you can see, attempt number 1 of whitewashing didn't go so well, so I adapted my technique. I got as much of the paint off the brush as possible and used a paper towel to wipe off any excess paint.

This is what it looked like after round 1 of painting. Better- but basically like I just did a crappy job of painting. So I decided to start sanding again, in hopes of giving it a more antique feel and making it look less like I just did a half-ass job of painting.


And you know what? I think it turned out alright and now it fits in with the rest of the really old furniture in my room.

I guess I accomplished antiquing, something that interior designers go to school for years and years to perfect (or maybe at least an afternoon class?). And you know what, mine was only 8 buck and it does a great job of holding all my books and my lamp next to my bed! Unemployment is fun!

Tuesday, June 2, 2009

Help me, Internets!

Ok, so I've been invited to a super fancy black-tie optional wedding this summer. Although I have a few more black-tie optional outfits in my closet than you probably expect), I've already worn most of them to an event with the same group of people that will be at this wedding. Not one to be wasteful (especially with something I spent over $200 on), I'm hoping to up-cycle this bridesmaid dress that's been sitting in my closet for 2 years since my lovely friend Elizabeth's wedding. I just hate to only use something once, but this is in a color that kind of screams "bridesmaid" at you loud and clearly so I haven't had a chance to reuse it in its current state. The obvious solution- alter it! I'm not genius at altering or embellishing and creativity isn't my strongest suit, so I'm hoping some of ya'll can help me out with suggestions. I'm super pumped about this eco-friendly black-tie project. Those don't come along too often!


As you can see, the color probably needs to be changed. But how well will overdying work for something like this? What would my color options be? Does anyone have an experience with that? The dress is floor length so I think I'll hem it to around knee length. Maybe the neckline could also be altered? Also, I would like to dress it up and make it a little unique with some sort of embellishment. Any suggestions?

Saturday, May 2, 2009

Help me, Internets!

Is anyone out there a seamstress? Here is the thing, I bought this totally awesome dress to wear to my sister's graduation. It was about 2 sizes to large but I thought, hey, no biggie. I can totally alter it. Famous last words, right? Well, my sister is graduating in a week and I have yet to do anything about this dress. Here is what it looks like hanging in a shapeless sack on my body:


My original thought was that I could just put a seam up the right side of the dress to take in the extra fabric. However, as you can see, there is so much extra fabric that it would make the dress totally off centered and bulky on the right. You might ask why I don't put a seam in the left side also to even things out. Well, I don't know how to deal with the zipper!


My second thought was to do like this and make it look like a wrap dress. Instead of holding it there all day, I would obviously have to find a big brooch or flower pin to hold it there. Now, this might work, but I think it will still look a little wonky.

What do ya'll think? Is there any hope I can alter this myself without totally ruining the dress? Anyone have any suggestions? Maybe I should just take it to the tailor, but I don't think they can finish it by my ETD, which is Wednesday AM. Help!!

Wednesday, April 15, 2009

More DIY fun

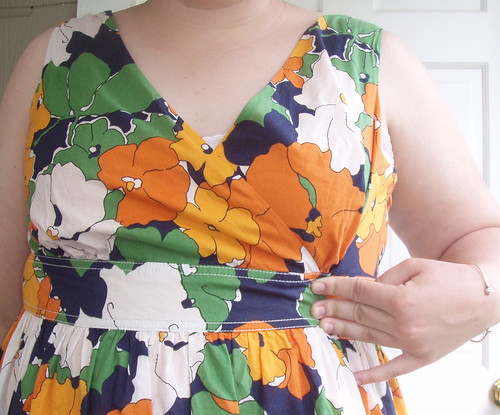
The dress I made last Friday got me thinking that I don't really make enough stuff! Here is the only dress that I have truly made from scratch.


I've made plenty of skirts and done some alterations, but it is so fun to make something totally from the bottom up. I'll have to add this to my list of 'if I ever find a free second' projects. Speaking of, Petey is talking to me loudly about how he needs a walk. Also, he hasn't made an appearance on the blog recently, so here he is- obviously helping me blog!